
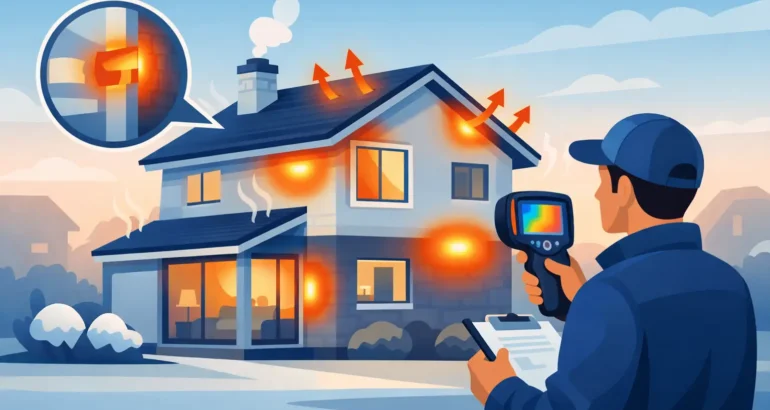
A newly built home should feel consistently comfortable, not noticeably cold beside a patio door, draughty around a loft hatch, or expensive to heat despite reasonable use. Knowing how to identify heat loss gives you a clearer basis for raising concerns with a developer, particularly before the end of the two-year builder warranty period.
Heat loss is not always a sign of one major fault. More often, it results from gaps in insulation, incomplete sealing around services, poorly fitted windows and doors, or thermal bridges in the building fabric. The challenge is separating a genuine performance issue from the normal feeling of a cold surface on a winter morning. A methodical inspection, supported where appropriate by thermal imaging, provides the evidence needed to pursue remedial work.
How to identify heat loss: start with the symptoms
Your day-to-day experience of the property is often the first indication that something needs investigating. A room that takes much longer to warm up than the rest of the house, a persistent cold spot at floor level, or a noticeable draught when the heating is off can point to unwanted air movement or missing insulation.
Pay attention to patterns rather than a single uncomfortable evening. Is the rear bedroom colder only when the wind is from a certain direction? Does condensation form repeatedly around one window while similar windows remain clear? Does the heating run for long periods but the temperature fall quickly once it switches off? These observations help establish where an inspection should focus.
Higher-than-expected energy use can also be relevant, but it is not proof by itself. Household routines, heating settings, occupancy and weather all affect bills. The more useful question is whether the home performs consistently with its layout, age and stated energy rating.
Check the areas where defects are most common
Heat naturally moves through the fabric of a building, but excessive loss often occurs where different elements meet or where construction has been interrupted. In new-build homes, these details deserve close attention.
Windows, external doors and openings
Run your hand carefully around closed window and door frames on a cold, still day. A localised stream of cold air may indicate failed or incomplete seals, gaps behind trims, poorly adjusted hinges or inadequate sealing around the frame. Do not mistake cold glass for a draught – glazing can feel cooler than an internal wall even when it is performing normally.
Look for visible gaps, damaged sealant, uneven reveals and doors that do not close firmly against their seals. Letterboxes, keyholes, trickle vents and extractor penetrations can also admit air. Trickle vents are designed to provide background ventilation, so they should not simply be blocked; the issue is uncontrolled draughts around them or elsewhere in the installation.
Loft hatches, ceilings and roof spaces
Warm air rises, making the upper floor and roof junctions particularly important. A loft hatch that is uninsulated, poorly sealed or not sitting squarely in its frame can create a clear cold patch below. Ceiling-mounted downlights and service penetrations may also compromise the air barrier if they have not been properly detailed.
Where access is safe and appropriate, a visual check of the loft can reveal displaced insulation, uneven coverage or insulation compressed around pipes and cables. Insulation should cover the intended area without large gaps. However, avoid moving insulation or entering roof spaces where boarding, safe access or structural conditions are uncertain. An inspection should identify concerns without creating damage or risk.
External walls, corners and junctions
Cold vertical strips on walls, cold corners, or lines that follow the position of floor joists and internal partitions may indicate thermal bridging. A thermal bridge is a route through which heat passes more readily than through the surrounding insulated construction. Some heat transfer at junctions is expected, but significant cold areas can raise the risk of surface condensation and mould.
Common locations include wall-to-floor junctions, lintels above windows and doors, corners, eaves, balcony connections, steelwork and areas around structural openings. The cause may be a design detail, incomplete insulation, or workmanship that has left a gap in the thermal envelope. Establishing which is the case matters because the remedial approach will differ.
Floors, skirting boards and service penetrations
A cold line around the edge of a ground-floor room can result from gaps at the floor-to-wall junction, incomplete insulation, or air leakage around pipework and cables. Check beneath kitchen units, around boxing, behind radiators and where services enter the home. These areas are frequently concealed and can be overlooked during finishing works.
Do not rely on expanding foam or sealant as a universal fix. Sealing a visible gap may reduce a draught, but it may not address missing insulation, poor cavity barriers or a defect behind the wall lining. Any repair should be proportionate to the confirmed cause.
Use simple checks carefully
A basic visual and tactile review can help you record concerns before contacting the developer. Take dated photographs of defective seals, gaps, staining, condensation and any visible insulation irregularities. Keep a short log of the room, weather conditions, heating setting and what you noticed. This is more useful than a general statement that the house feels cold.
You can use the back of your hand to detect obvious draughts, or hold a lightweight piece of tissue near a suspected gap to see whether air movement is present. Take care around open flames, gas appliances and mechanical ventilation terminals. Smoke pens and similar tools can assist trained inspectors, but their results can be affected by wind, ventilation systems and pressure differences within the building.
An inexpensive infrared thermometer can identify temperature differences between surfaces, although it cannot diagnose why they exist. Shiny surfaces, glass and reflective materials can produce misleading readings, while a cold external corner may be normal in certain weather conditions. Treat these checks as indicators for further investigation, not conclusive evidence.
Why thermal imaging gives stronger evidence
A professional thermal imaging survey can show temperature variations across walls, ceilings, floors, windows and junctions. On a thermal image, cooler areas may appear as contrasting colours, helping an inspector identify patterns consistent with air leakage, missing or displaced insulation, thermal bridging, moisture or defects around openings.
Thermal imaging does not see through walls, and it cannot prove every cause in isolation. A cold area might be caused by heat loss, but it could also reflect shadowing, moisture, a radiator position, internal furnishings or temporary weather conditions. This is why images must be interpreted alongside a visual inspection, construction details and the property’s conditions at the time of survey.
For meaningful results, there normally needs to be a sufficient temperature difference between inside and outside. Surveys are often most effective during colder weather, with the home heated in a stable and normal manner beforehand. External sun, rain and strong winds can influence findings, so a competent surveyor will assess whether conditions are suitable and record relevant limitations.
A well-prepared report should identify the location of each concern, include supporting thermal and photographic evidence, explain the likely issue in clear terms and recommend proportionate next steps. This gives a developer or contractor something specific to investigate rather than an open-ended complaint about comfort.
Consider ventilation and moisture before sealing everything
A warm home also needs controlled ventilation. Extractor fans, trickle vents and other ventilation provisions are intended to manage moisture and maintain indoor air quality. Blocking them to stop a perceived draught can lead to condensation, mould growth and a different set of defects.
The distinction is between planned ventilation and uncontrolled leakage. Air should enter and leave through designed routes, not around poorly sealed window frames, service penetrations or gaps in the fabric. If condensation is present, the assessment should consider occupancy, heating, ventilation performance and cold surfaces together. Blaming insulation alone can lead to the wrong remedy.
When to arrange an independent heat loss survey
An independent survey is particularly valuable when a developer has dismissed a concern as normal, when there is visible mould or recurring condensation, or when multiple rooms are difficult to heat. It is also sensible before the two-year warranty period ends, when unresolved workmanship issues should be documented clearly.
For a new-build property, arrange the inspection after you have lived through enough colder weather to identify patterns, but do not leave it until the final weeks of the warranty. Early evidence allows time for the developer to inspect, propose works and return if repairs are incomplete. If the property is due to complete in winter, a post-completion thermal assessment may be more informative than a pre-completion visit because the heating can be operated and the building occupied normally.
New Homes Inspections can provide an evidence-led heat loss survey that focuses on practical defects, likely causes and clear remedial actions. The value is not simply in producing thermal images; it is in presenting findings in a form that supports constructive discussions and protects your investment.
If your new home has cold rooms, persistent draughts or unexplained condensation, record what you are experiencing now. Clear observations, made early and backed by independent inspection where needed, put you in a stronger position to secure the standard of construction you were promised.