

The excitement of a new build home – fresh, modern, no hidden surprises, right? Not always. Even new builds can have snags – defects ranging from minor cosmetic issues to more significant structural problems. A comprehensive snagging checklist is your best friend. It empowers you to ensure your dream home is truly flawless before you fully settle in. This in-depth guide will walk you through everything you need to know about snagging checklist for your new build, including a detailed, room-by-room checklist, tips for effective inspection, and advice on communicating with your builder.
What is Snagging and Why is it Crucial for a snagging checklist for Your New Build?
A “snag” is an imperfection, an unfinished bit of work, or a defect in a newly built property. This could be anything from a paint smudge on a window frame to a more serious structural crack.
It’s essential for new builds because it ensures your home meets the expected build quality and standards, offering quality assurance. Identifying issues that the developer is responsible for fixing now can save you future costs, providing crucial financial protection. Ultimately, a thorough snagging process brings peace of mind, guaranteeing your biggest investment is sound and safe. It also helps address issues while they’re covered by your new build warranty (e.g., NHBC, Premier Guarantee). Don’t fall for the misconception that “it’s a new build, it’ll be perfect.”
When to Conduct Your Snagging Inspection: Timing is Key for a snagging checklist
Timing your snagging inspection strategically can make a big difference.
A Pre-Completion Inspection (PCI) is ideal, happening before legal completion and before you move in. The benefit is that the builder can rectify issues before you even get the keys. However, PCIs can have limitations, such as restricted access for the inspector, potentially leading to a less thorough check.
The most common time is a Post-Completion Inspection, as soon as possible after moving in. This gives you full access to the property and allows you to test all systems with utilities on. We recommend conducting this within the first few weeks or months, ideally within the first two years, as this is typically when the developer is responsible for addressing snags. Inspecting early is always best, as builders are often still on-site, making rectification quicker.
DIY vs. Professional Snagging Survey: Which is Right for You?
You have two main options when it comes to snagging your new home.
DIY Snagging Checklist is cost-effective and allows you to become personally familiar with every inch of your new home. However, it requires a keen eye, some knowledge of building standards, can be time-consuming, and you might miss hidden issues. Our detailed checklist is designed to help you conduct a thorough DIY inspection!
A Professional Snagging Survey offers the expertise of qualified inspectors who use specialist equipment (like thermal cameras) and provide comprehensive, unbiased reports. While there’s a cost involved (typically £300-£600+), professionals often spot issues a buyer might miss. Consider one if you lack confidence in your own ability, have a high-value property, or suspect significant underlying problems.
Feeling Overwhelmed? Let the Experts Handle Your New Home Inspection and create a snagging checklist
While our comprehensive snagging checklist empowers you to conduct a thorough DIY snagging checklist we understand that for many, the task can feel daunting or time-consuming.
For complete peace of mind, or if you suspect hidden structural issues, a professional new homes inspection is invaluable. Our certified inspectors use advanced tools and in-depth knowledge of building regulations to uncover even the most subtle defects.
Don’t leave anything to chance with your biggest investment.
Ready for a truly flawless new home? Contact us today to schedule your professional new home inspection and ensure every detail is perfect.
[Book Your New Home Inspection Now]
Your Ultimate Snagging Checklist: Room-by-Room & Exterior
This comprehensive checklist will guide you through every area of your new build home.
General Checks (Exterior & Interior, Applicable Everywhere)
-
Overall cleanliness (no debris, paint splashes).
-
No damage (scratches, dents, chips on surfaces, fixtures, appliances).
-
Completeness of work (no missing items, no unfinished work).
-
Straightness and levelness of components (e.g., walls, skirting boards).
Exterior
-
Roof: Check for missing or cracked tiles, proper flashing, intact pointing, and secure, clear, leak-free gutters.
-
Walls/Render/Brickwork: Look for cracks, unevenness, missing mortar, damp patches, and overall cleanliness.
-
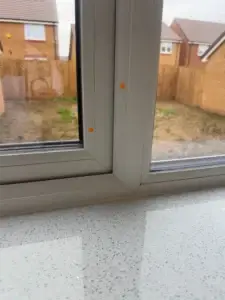
Windows & Doors (External): Inspect frames for damage or scratches. Ensure glass is free from cracks, scratches, or paint. Check seals and caulking. Verify windows and doors open and close properly, and that locks work with keys present. Confirm trickle vents are present and functional, and security measures are in place.
-
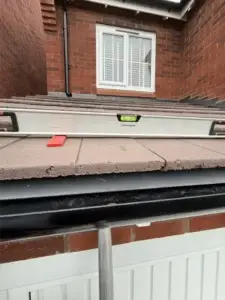
Driveways, Paths & Patios: Check for levelness, cracks, proper drainage, and evenly spaced paving with sufficient sand.
-
Gardens & Fences: Ensure turf is level, drainage is adequate, and fences and gates are sturdy, secure, and properly painted or treated. Check outdoor taps and external lighting.
-
Garage/Outbuildings: Inspect doors, windows, floor, internal finish, and electrical sockets.

Interior – General Areas (Hallways, Landings, Stairs)
-
Walls & Ceilings: Plasterwork should be smooth, even, with no bumps or cracks larger than a 10 pence piece. Finishes around fittings should be neat. Paintwork should be even, without runs or drips, and no missed spots.
-
Floors: Verify they are level, the screed is free from cracks, and floorboards don’t creak. Check carpet or other flooring for ripples or gaps, and ensure skirting boards are secure and properly finished.
-
Doors & Doorframes (Internal): All doors should open and close freely, be secure, and have even gaps around the frame. Locks, latches, and hinges should work correctly without squeaking. Handles should operate smoothly, and all hinges and handles should be free from paint. Verify door stops are fitted where required.
-
Stairs: Ensure stairs are properly secured. Handrails and spindles should be secure, stable, and free from damage. Treads should be level and not creak. Spindle spacing should be even, with less than 100mm between them, and the handrail should be at the correct height (e.g., 900mm) with adequate headroom.
Kitchen
-
Units & Worktops: Check for damage, proper alignment, and smooth operation of all doors and drawers. Inspect tiling, grouting, and sealing around the sink.
-
Appliances (integrated): Confirm functionality of oven, hob, extractor, dishwasher, etc. Check for damage. Ensure user manuals and warranties are present, and appliances have correctly labelled switched spurs.
-
Plumbing: Test taps for hot/cold flow and leaks. Check sink drainage and overflow, and ensure waste pipes are correctly installed.
-
Electrics: Verify all sockets, switches, and under-cabinet lighting are working correctly.
Bathrooms/En-suites/WCs
-
Tiling & Grouting: Should be even, consistent, free from cracks, and properly sealed around the bath, shower, and basin.
-
Sanitaryware: Toilets should flush and fill correctly and be securely fitted. Basins should have working taps, overflow, and no leaks. Showers should have good pressure and temperature, no leaks, and correctly fitted screens.
-
Ventilation: Confirm extractor fans are working.
-
Fixtures: Mirrors, towel rails, etc., should be securely fitted and undamaged.
Bedrooms & Living Areas
-
Repeat general interior checks (walls, floors, doors, paint).
-
Wardrobes (fitted): Check door operation, internal fittings, and alignment.
Utility Room/Airing Cupboard
-
Plumbing for appliances: Ensure washing machine and dryer connections are correctly fitted and free from leaks.
-
Boiler: Should have adequate clearance if in a cupboard, the surrounding wall made good, and you should have user manuals and a gas safety certificate.
-
Water tanks/pipework: Verify proper insulation.
Electrics & Lighting (Overall)
-
All lights should work and be adequate. Wet area spotlights and switches should be compliant.
-
All electrical, TV, and phone sockets should work, be uniform in appearance, at the correct height, and fitted level.
-
The fuse box should be correctly fitted and fully labelled.
-
Smoke and carbon monoxide alarms should be present and working.
-
The heating thermostat should be fitted correctly, easily accessible, and in the right position (not above a radiator or heat source).
-
Fan isolators should be present and fitted at high level outside all bathrooms and toilets.
-
You should have an electrical safety test certificate.
Heating & Plumbing (Overall)
-
The heating system should work, and all radiators (bar one) should have TRVs and be securely fixed to walls.
-
Radiators and pipework should be free from leaks, damage, chips, and paint splashes.
-
All taps should work, and the toilet should flush.
-
The stop cock should be easily accessible and labelled.
How to Document Your Snagging checklist Effectively
Effective documentation is key to getting issues resolved. Here’s your “snagging kit” and some tips:
Your Snagging Kit
-
Printable checklist: (Don’t forget to download our PDF version!)
-
Pen/pencil for notes.
-
Camera/smartphone for photos and videos.
-
Masking tape or small stickers to mark snags (be polite – it’s a guide for the builder, not a complaint).
-
Spirit level and tape measure for specific checks.
Tips for Documentation
-
Be methodical: Work room by room, top to bottom.
-
Be specific: Describe the exact issue and its location (e.g., “scratch on lower left pane of living room window, approx. 5cm long”).
-
Take clear photos/videos: Get close-ups of the snag and wider shots for context. Date and time stamp your photos if your device allows.
-
Keep a written log: Note the location, the specific issue, and the date you found it.
Reporting Snags to Your Builder: What to Expect
Once your list is complete, it’s time to report.
Always report snags in writing, usually via email. Maintain a professional tone; present your list clearly and calmly.
What to Include in Your Report
-
Your contact details.
-
The full property address.
-
Your comprehensive snag list (attach your detailed log with supporting photos/videos).
-
Your desired timeframe for resolution (e.g., “within X weeks as per our contract/warranty”).
Expect the builder to acknowledge your report and propose a timeline for rectification. Don’t be afraid to follow up politely if deadlines are missed. If disputes arise or issues aren’t resolved to your satisfaction, remember you can escalate the matter through your warranty providers (NHBC, Premier Guarantee, LABC Warranty) or the New Homes Ombudsman Service.
After the Snags Are Fixed: Final Checks
Once your builder notifies you that the snags have been addressed, it’s crucial to re-inspect all rectified issues. Ensure the fix is to an acceptable standard and that no new issues were created during the repair process. Confirm your satisfaction in writing.
Your Perfect New Home Awaits
Thorough snagging checklist is a vital step in buying a new build. You have the right to a high-quality new home, and taking action now protects your investment.
Whether you choose to use our detailed DIY checklist or opt for the expertise of a professional new home inspection, taking action now ensures your property is a sound and perfect investment for years to come.
Download our comprehensive printable snagging checklist PDF! [Link to PDF]
Or, if you prefer expert eyes, explore our professional inspection services.
A little effort now ensures years of enjoyment in your flawless new home.