
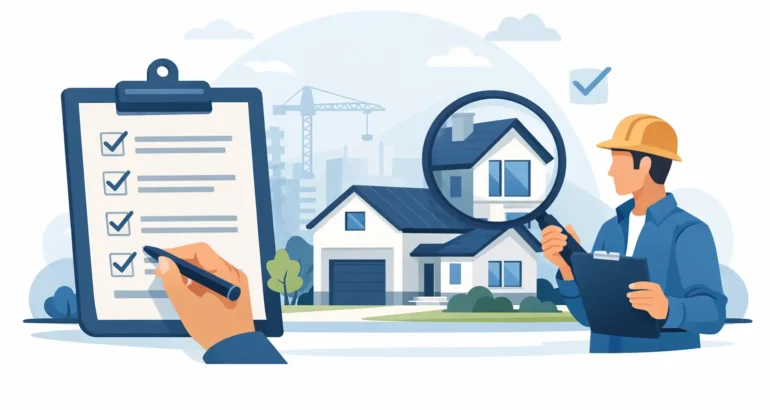
If your developer has offered a pre-handover visit, treat it as more than a quick look round with a clipboard. A pre completion inspection checklist gives structure to that visit and helps you focus on defects, finish quality and signs that work has been rushed. On a new-build home, small issues can point to wider workmanship concerns, and this is often the best chance to raise them before legal completion.
For buyers in the Midlands and South Yorkshire, the pressure to exchange and complete can make this stage feel procedural. It is not. Pre-completion is one of the few points where defects can be identified before you take ownership, utilities are fully in your name and snagging becomes harder to separate from wear and tear. A careful inspection, backed by evidence, can make a real difference to the standard of the property you move into.
What a pre completion inspection checklist should cover
A useful pre completion inspection checklist is not just a room-by-room punch list. It should look at workmanship, function, safety, finish and compliance indicators across the property. That means checking whether items are present, but also whether they are fitted correctly, operate as intended and meet the standard a reasonable buyer should expect from a new home.
Externally, start with the structure and envelope. Roof coverings, verge details, flashing, brickwork, render, pointing and weep vents should all appear complete and consistent. Poorly finished masonry, cracked mortar, staining beneath openings or uneven coursing may suggest weak quality control. Windows and doors should sit squarely, seals should be intact and frames should not show damage, bowing or gaps.
Ground levels matter more than many buyers realise. Paths, patios and driveways should fall away correctly, drainage should be in place and gullies should not sit proud or collect standing water. If external levels are too high against the wall, that can create future damp risk. Fencing, gates and boundary treatments should also be complete and secure, especially where the sales specification promised them.
Inside, the inspection should move beyond cosmetic marks. Walls and ceilings should be checked for cracking, poor plaster finish, undulation, nail pops and inconsistent decoration. Floors should feel level underfoot and should not bounce, creak excessively or show unfinished junctions. Joinery such as skirting, architraves, handrails and doors should be secure, aligned and neatly finished.
Kitchens and bathrooms deserve close attention because they combine several trades in one area. Look at sealant lines, tiling, sanitaryware installation, cabinet alignment, worktop joints and extractor fitting. Tap operation, waste drainage and water pressure should be checked where services allow. A bath panel that fits poorly or a basin waste that drains slowly may seem minor, but it often points to hurried installation rather than isolated snagging.
Key areas buyers often miss
The most obvious faults are rarely the only ones. Buyers tend to spot paint blemishes and scratched glass, but miss signs of incomplete commissioning or poor detailing. This is where inspection experience matters.
Loft access, for example, is often overlooked. If accessible, the hatch, insulation placement, fire stopping and general finish should be reviewed. Ventilation provision is another area frequently missed. Trickle vents, extract fans and air circulation routes need to be present and functional, particularly in kitchens, bathrooms and utility areas where moisture build-up can become a long-term problem.
Stairs and balustrades should feel rigid and compliant. Newel posts, spindles and handrails should not move under hand pressure. Around sockets, switches and consumer units, finishes should be neat and securely fixed. Heating controls should be installed and understandable, not just present. If the boiler, thermostat or hot water settings have not been properly commissioned, you can end up moving into a house that is technically complete but not practically ready.
Openable windows should operate smoothly and lock correctly. Internal doors should latch properly without binding, and fire doors, where specified, should close as intended. Poor closing action is not always just an annoyance. In some cases it can indicate frame distortion, poor fitting or non-compliant installation.
Using a pre completion inspection checklist properly
A checklist only works if it is used methodically. Start outside and work in a consistent direction through the plot, then inspect each room from top to bottom. Take photographs as you go and note the exact location of each issue. “Scratch in bedroom” is weak evidence. “Two deep scratches to internal pane, rear right bedroom window, lower centre” is far harder to dispute.
Good daylight helps. So does time. If you are being hurried through the property, you are less likely to notice defects in finishes, alignment and workmanship. It is reasonable to expect enough time to inspect a home properly. You are not being difficult by checking what you are about to complete on.
It also helps to separate items into categories. Cosmetic defects are usually straightforward, but functional faults, incomplete works and possible compliance concerns should be flagged more clearly. A chipped tile may be easy to fix. Missing loft insulation, poor drainage falls or loose stair guarding deserve a different level of urgency.
There is also a trade-off between what can be seen at pre-completion and what may only become clear after occupation. You may not be able to fully assess heating performance, water ingress during rainfall or thermal bridging from a short visit alone. That is one reason some buyers choose an independent inspection before completion and then a more detailed snagging review after handover.
Why independence matters
A developer’s own quality process is not the same as independent inspection. Site teams work to programme pressures, subcontractor availability and handover targets. Many do rectify defects promptly when they are raised, but relying entirely on the same delivery chain that built the property is not always enough.
An independent surveyor approaches the property from the buyer’s side. The focus is not on whether the plot is ready for a target date, but on whether workmanship, finish and visible standards meet expectations for a new-build home. Evidence-led reporting can also help when you need to challenge a disputed issue or show that a defect was present from the outset.
For that reason, many buyers use a checklist as a starting point, then bring in a specialist if anything feels incomplete, inconsistent or below standard. New Homes Inspections carries out pre-completion inspections with that practical objective in mind – to identify defects clearly, document them properly and give buyers a stronger basis for remedial action.
What to expect from a professional pre-completion inspection
A professional inspection should be systematic, not superficial. That means reviewing external elements, internal finishes, fixtures, joinery, service points and visible construction details in line with recognised tolerances and new-build expectations. The value is not just in spotting more defects. It is in knowing which findings are routine snagging, which suggest poor workmanship and which may indicate a wider quality or compliance issue.
The reporting matters as much as the inspection itself. Clear photographs, precise descriptions and a structured defect schedule are far more effective than a handwritten list. Developers are more likely to act when issues are documented properly, especially where the wording is factual and evidence-based rather than emotional.
It also provides reassurance. Some homes present well on first glance and still have very few meaningful issues. Others look tidy enough until closer inspection reveals poor finishing, incomplete sealing, misaligned fittings or signs of rushed installation. Either way, you are making decisions on evidence, not assumptions.
A practical checklist mindset before completion
If you are preparing for handover, think like an inspector rather than a visitor. Check finish, operation and fit. Look closely at edges, junctions and areas where different materials meet. Open, close, test and photograph where possible. Compare what you see with what was specified, and do not assume that “new” automatically means “right”.
Most defects at this stage are fixable. The real issue is whether they are identified early, recorded properly and raised with enough clarity for the developer to act. A careful pre completion inspection checklist helps you do that, whether you are carrying out an initial walk-through yourself or arranging an independent professional assessment.
A new-build home should be handed over ready to live in, not ready to start arguing over. A well-timed inspection gives you the best chance of moving in with confidence and with fewer problems following you through the front door.