
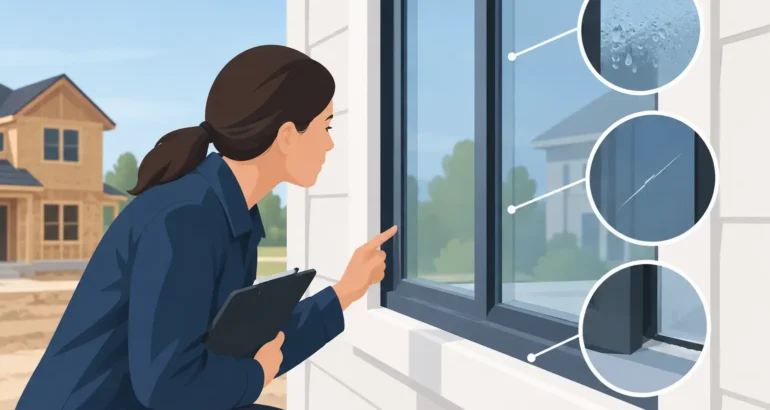
A window can look clean and complete on handover day while concealing problems that affect warmth, security, ventilation and water resistance. Knowing how to spot window defects gives you a stronger basis for asking a developer to investigate and rectify issues before they become harder to evidence or fall outside the builder’s warranty period.
For new-build buyers, windows should not be treated as a cosmetic detail. They form part of the building envelope and must be fitted, sealed and adjusted correctly. A poorly installed window may allow cold air or rainwater into the property, cause condensation, compromise acoustic performance or place unnecessary strain on locks and hinges.
How to Spot Window Defects Before They Escalate
The best time to inspect windows is in daylight, ideally when you can view both the internal and external finishes. Do not rely on a quick glance from the centre of a room. Open every window, run your hand around the frame, check the glazing from different angles and inspect the reveals, sills and seals closely.
Some defects are obvious from the outset. Others only become apparent in wet, windy or cold conditions. This is why a pre-completion inspection, post-completion snagging survey or two-year warranty inspection can be valuable: it provides an independent, documented assessment rather than relying solely on a homeowner’s observations.
Start with the frame and surrounding finish
Look for scratches, dents, cracks, chips and distortion to uPVC, aluminium or timber frames. Minor marks may be cosmetic, but deep damage can affect the finish, drainage routes or long-term durability. Check that frame corners are square and tightly joined, with no obvious gaps or excessive sealant used to disguise poor workmanship.
Internally, inspect plaster, paintwork and window boards around the opening. Cracking to plaster, gaps between the frame and wall, uneven trims or loose boards may indicate that the opening has been poorly finished or that movement is occurring. A narrow, consistent perimeter gap is not necessarily a concern where it is properly sealed. Irregular gaps, exposed foam or crumbling sealant require further attention.
Externally, look at the junction between the frame and the brickwork, render or cladding. Sealant should be continuous, neat and securely bonded. It should not be split, missing, excessively thin or pulling away at the edges. Poor perimeter sealing can allow water penetration and unwanted air leakage, particularly on exposed elevations.
Check the glass closely
Glazing defects are frequently missed because they can be difficult to see in ordinary indoor light. Stand at an angle to the pane and use reflected daylight to identify scratches, scuffs, chips, trapped debris or marks within the double-glazed unit. Surface marks may sometimes be polished or cleaned, but scratched or damaged glass may need replacement depending on its location and severity.
Moisture, misting or a hazy appearance between the panes is more significant. It can indicate failure of the sealed unit, allowing the insulating gas to escape and moisture to enter. This reduces thermal performance and cannot usually be resolved by cleaning the glass from either side.
Also check for cracked panes, even hairline cracks at corners. Glass can crack through impact, but it may also be affected by frame movement, incorrect packing, thermal stress or installation faults. The cause matters because simply replacing the pane may not address the underlying issue.
Test Operation, Locks and Hinges
Every opening window should operate smoothly without needing excessive force. Open and close casement windows fully, then test tilt-and-turn units in each intended position. The sash should sit evenly in the frame and engage with the locking points without lifting, dropping or being forced into place.
Sticking, rubbing or catching may indicate poor adjustment, misalignment, warped components or installation tolerances that have not been properly addressed. A window that closes today but requires force may place strain on hinges and locking mechanisms over time.
Check each handle, key and restrictor. Handles should be secure, locks should engage fully and keys should turn without resistance. Safety restrictors must work as intended, particularly in upper-floor rooms where window safety is more critical. Do not assume a window is secure simply because the handle turns. Look at whether the sash actually pulls tight against the seals when locked.
Trickle vents should also open and close correctly. These vents form part of the home’s ventilation strategy and should not be painted shut, blocked by debris or fitted in a way that prevents normal operation. Reduced ventilation can contribute to condensation and poor indoor air quality, although it should not be used as an excuse for defects such as failed seals or uncontrolled draughts.
Look for Draughts, Water and Condensation
Draughts around a closed window are a common concern in new homes. On a cold or windy day, slowly move the back of your hand around the frame edges, opening sash and window board. You may feel localised air movement around seals, hinges or perimeter joints. A smoke pen can help identify air paths, but this should be used carefully and away from smoke alarms.
Not every sensation of cool air is a defect. Glass naturally feels cooler than an insulated wall, and background ventilation through trickle vents is intentional. The concern is uncontrolled air leakage through closed junctions, poorly seated gaskets or gaps around the frame.
Signs of water ingress include damp patches, staining, peeling paint, swollen window boards, mould growth and water droplets collecting on internal finishes after rainfall. If possible, note which direction the elevation faces and whether the issue follows wind-driven rain. This helps establish a pattern when reporting the defect to the developer.
Condensation needs a balanced assessment. Moisture on the room-facing side of glass can result from high indoor humidity, insufficient heating or limited ventilation, especially in a newly occupied home while construction moisture dries out. Condensation between panes is different and is normally evidence of a failed sealed unit. Persistent mould or dampness around the frame should always be investigated rather than dismissed as everyday condensation.
Inspect Drainage Paths and External Details
Most modern window systems include drainage channels and small outlet slots, often called weep holes, to direct water away from the frame. Check externally that these are not blocked by sealant, render, mortar, paint or debris. Blocking them can cause water to collect within the frame and may lead to internal leakage.
Look at external sills too. They should be secure, appropriately sloped to shed water and finished with a clear drip detail where applicable. Cracked render below a window, poor flashing details, missing sealant or water tracks down the façade may point to an issue at the interface between the window and the surrounding wall rather than the glazing itself.
Where windows are high-level or difficult to access safely, do not climb ladders or lean out of openings. Specialist inspection methods, including drone imaging where suitable, can provide clear evidence of external defects without creating unnecessary risk.
Record Defects in a Way a Developer Can Act On
A vague report of a “bad window” is easy to delay. A clear record is harder to dispute. Photograph the issue from close range and from enough distance to show its exact location. Include the room, elevation, window type and date, and take a short video where the fault concerns operation, draughts or water ingress.
Describe the observable problem rather than guessing at the remedy. For example, record that the bedroom casement sash catches on the lower frame and requires force to lock, or that misting is visible between the panes of the kitchen window. This keeps the report factual and gives the developer a defined issue to inspect.
For several separate defects, a structured snagging report can be particularly effective. It creates an evidence trail, records location and severity, and distinguishes cosmetic shortcomings from issues that may affect weather resistance, security, performance or compliance. New Homes Inspections provides independent inspection reporting to help owners present defects clearly and pursue appropriate remedial action.
When a Window Issue Needs Prompt Attention
Some window snags can wait for a planned developer visit, such as a small cosmetic scratch or a slightly untidy internal seal. Others should be reported promptly. Water ingress, cracked glazing, a window that will not lock, loose frames, failed sealed units and significant draughts can affect the safety, security and performance of the home.
It also depends on timing. Early reporting is sensible after completion, but the approach should not stop there. Recheck windows through their first autumn and winter, when rain, wind and temperature differences make defects easier to identify. Before the end of the builder’s two-year warranty period, arrange a thorough review of any recurring condensation, leaks, operational problems or deteriorating seals.
A well-fitted window should close securely, keep weather outside and support a comfortable home without constant adjustment. If something does not look, feel or operate as it should, record it early and ask for a proper inspection – protecting your investment starts with the details that are easiest to overlook.