
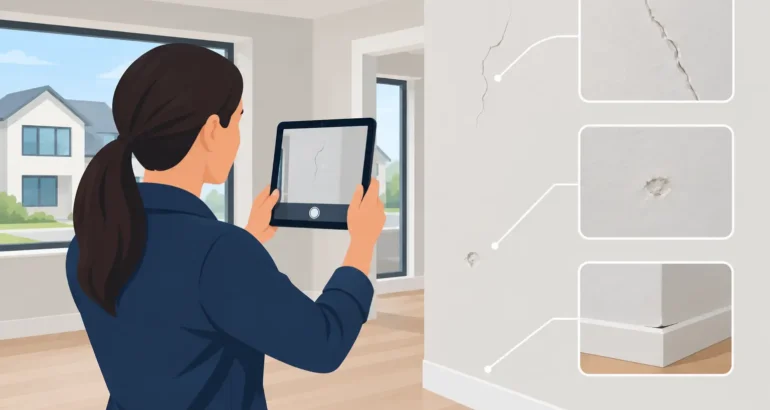
A developer may agree to address an issue verbally, but verbal assurances are difficult to rely on once trades have left site, personnel change or a warranty deadline approaches. Knowing how to document defects properly gives you a clear, dated record of what was found, where it is located and why remedial work is required. It also helps you protect your investment without turning every minor concern into an unproductive dispute.
For new-build homeowners, the strongest evidence is not simply a long snagging list. It is a structured defect record that allows a developer, site manager or warranty provider to understand the issue quickly and take the right action. Clear records also make it far easier to check that a repair has genuinely resolved the problem.
How to document defects before they are repaired
Document a defect as soon as you notice it and, wherever possible, before anyone attempts a repair. This is particularly important for leaks, cracking, drainage concerns, roof defects, poor finishes and issues that may be hidden once remedial work begins.
Start by creating one central defect log. A spreadsheet, numbered document or inspection report can all work, provided each entry has its own reference number. Avoid relying solely on messages, scattered photographs or memory. A record that can be sorted by room, date, trade or priority is much easier to manage as the list grows.
For every item, record the date found, the precise location, a straightforward description, supporting photographs and the date it was reported. If the developer has provided a plot number, job reference or customer-care case number, add that too. This establishes a useful audit trail from identification through to closure.
Use practical location descriptions rather than general wording. For example, write `Bedroom 2, external wall beside the left-hand window reveal, approximately 400mm above skirting level` rather than `crack in bedroom`. A tradesperson should be able to find the issue without having to ask you which wall, window or room you mean.
Describe the defect, not just the symptom
A good description states what you can see, hear or measure without guessing at the underlying cause. This distinction matters. A homeowner may reasonably report staining to a ceiling after rainfall, but should not state that a particular roof component has failed unless there is evidence to support that conclusion.
Describe the observed condition first: `Brown water staining and damp plasterboard to the ceiling below the rear roof slope, first observed after sustained rain.` Then record relevant circumstances, such as the weather, whether the property was occupied, whether a window was closed, or whether heating was operating. This helps establish patterns without overstating the diagnosis.
For finish-related defects, be specific about the condition. Note chipped paintwork, uneven sealant, gaps at skirting boards, poorly fitted doors, damaged glazing, loose tiles or uneven flooring. Where appropriate, include a simple measurement. A tape measure, ruler or spirit level held within the photograph can provide useful scale, particularly for gaps, cracks, uneven surfaces and misalignment.
It is also sensible to separate defects from preferences. A colour variation in natural materials or a minor feature that falls within the relevant tolerance may not require remedial work. Conversely, an issue that affects safety, weather resistance, thermal performance, function or compliance deserves prompt attention even if it initially appears small.
Take photographs that prove location and scale
Photographs are often the most persuasive part of a defect record, but only when they provide context. A close-up image of a crack or stain may show the condition, yet it does not prove where it is in the property. Take a sequence of images for each defect: a wide shot showing the room or elevation, a mid-range shot showing the affected area, and a close-up that captures the detail.
Use natural light where possible and keep the image in focus. Do not apply filters or edit the image in a way that changes the appearance of the defect. If your mobile phone allows it, retain the original file with its date information. For difficult-to-access locations, such as roof coverings, high-level gutters and chimney details, specialist drone imaging can provide evidence that would otherwise be unsafe or impossible to obtain from ground level.
For defects involving heat loss, moisture or air leakage, standard photographs may not tell the full story. Thermal imaging and moisture investigations can add valuable evidence, but their findings need to be interpreted in the right conditions. A thermal image taken in unsuitable weather, for example, may be less meaningful than it appears. This is where an independent surveyor can distinguish a visible anomaly from a confirmed building-performance concern.
Record impact and priority clearly
Not every snag needs the same response. Prioritising your log helps the developer deal with urgent matters first and prevents significant concerns being lost among cosmetic items.
Issues affecting safety, water ingress, electrical installations, gas appliances, structural movement, fire safety, security or major drainage failures should be reported immediately. If there is a risk to people or the building, follow the developer’s emergency procedure and seek suitable professional advice where necessary. Do not wait for a routine snagging visit.
Other defects may be important but less urgent, such as poorly operating windows, damaged joinery, defective extractor fans, missing insulation evidence or workmanship issues to finishes. Record the practical impact: a door does not latch, an extractor does not clear condensation, a radiator does not heat evenly, or a window allows a noticeable draught. This is more useful than simply labelling an item as poor quality.
A simple priority system can help: urgent for safety or active damage, high for performance or functional failures, and routine for workmanship and finish items. The category is not a substitute for professional assessment, but it makes communication clearer and supports sensible remedial planning.
Keep communication formal and traceable
Send your defect log to the developer through its stated customer-care route and retain copies of all correspondence. In your message, ask for acknowledgement, a proposed inspection date and a target date for remedial works. If work is carried out, update the original record rather than deleting it. Add the repair date, details of what was done and fresh photographs of the result.
Do not mark an item as closed simply because a contractor attended. Check that the original issue has been resolved and that the repair has not created further damage, poor decoration or a repeat fault. This follow-up process is often called back snagging, and it is particularly valuable where multiple trades have been involved.
Keep a record of appointments that were missed, repairs that remain incomplete and defects that recur. Be factual and measured. A well-organised history of dates, photographs and communications is more effective than emotional language, especially if the matter later needs to be escalated through the developer’s formal process or considered against applicable warranty standards.
Use an independent inspection when the evidence needs weight
There are occasions when a homeowner’s photographs and notes are enough to secure action. There are also occasions when the issue is disputed, technically complex or difficult to inspect safely. Roof concerns, persistent damp, suspected insulation gaps, significant cracking, drainage problems and widespread workmanship issues can benefit from an independent assessment.
A professional snagging or warranty inspection provides a structured report with defect locations, photographs, observations and clear recommendations for remedial action. It can also assess concerns against relevant construction standards, tolerances and warranty expectations, while remaining independent of the developer. For homeowners nearing the end of a two-year builder warranty period, this evidence can be especially valuable because it identifies issues before the window for reporting them becomes more difficult.
New Homes Inspections approaches defect reporting as an evidence-led process: identify the condition, record it accurately, assess its practical significance and provide a clear basis for remedial action. That clarity helps homeowners move discussions away from opinion and towards accountable outcomes.
Your records do not need to be complicated, but they do need to be consistent. Start the log early, photograph before repairs begin and keep checking each item until the home performs and finishes as it should.