
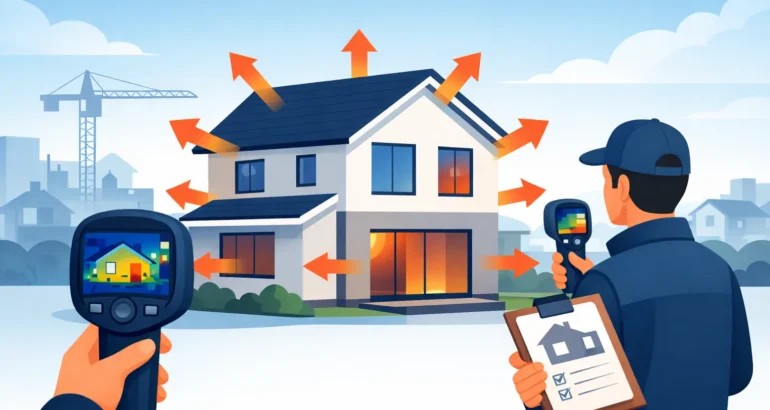
A room that never quite warms up, a cold strip around a window reveal or condensation returning to one corner can be more than an inconvenience in a recently built home. This heat loss survey guide explains how an independent thermal assessment identifies where a property may be losing heat, what the findings can and cannot prove, and how documented evidence can support remedial action from a developer or contractor.
What a heat loss survey is designed to find
A heat loss survey uses thermal imaging, supported by a visual inspection and building knowledge, to identify unusual temperature patterns across the building envelope. The building envelope includes the roof, external walls, windows, doors, floors and the junctions between them.
Thermal cameras do not see heat escaping in the way many people expect. They record surface temperatures and display differences in colour or shade. A surveyor interprets those patterns alongside the construction type, weather conditions, heating arrangements and any visible defects. That distinction matters. A cold area may indicate missing or poorly fitted insulation, but it could also be caused by air leakage, thermal bridging, moisture or a heating issue.
For new-build homeowners, the survey is particularly useful where the home feels difficult to heat, certain rooms are consistently colder, or there are concerns about workmanship before the builder’s warranty period ends. It provides an evidence-led starting point rather than relying on a general complaint that the house feels cold.
Why new-build homes can still lose heat
A new home should meet the energy-efficiency requirements in force when it was built, but compliance on paper does not always mean every detail has been installed correctly on site. Small gaps and poor junction details can have a noticeable effect on comfort, particularly during colder weather.
Common areas of concern include insulation that has been disturbed or omitted around loft hatches, eaves and service penetrations; poorly sealed doors and windows; gaps around pipework or extractor vents; and cold bridges at wall-to-floor, wall-to-roof and window junctions. A thermal bridge is a route through which heat passes more readily than through the surrounding insulated construction. It is often associated with structural elements or incomplete insulation at junctions.
Not every temperature difference is a defect. Radiators, underfloor heating pipes, sun exposure, furniture against external walls and recently opened windows can all affect the image. This is why a credible inspection requires controlled conditions and professional interpretation, not simply a photograph from a handheld thermal camera.
When a heat loss survey is most worthwhile
The best time depends on the concern and the weather. Thermal imaging normally works best when there is a meaningful temperature difference between inside and outside, commonly during the colder months with the heating operating as usual. Stable conditions are preferable. Strong sunshine, heavy rain and rapidly changing temperatures can make readings less reliable or harder to interpret.
A survey can be valuable soon after moving in if comfort problems are apparent, but it is also well suited to homeowners approaching the end of their two-year builder warranty. By that stage, the property has been lived in through different seasons and recurring issues are often easier to identify. If defects are found, the report gives the homeowner clear observations to raise with the developer before the warranty window closes.
For buyers who have not yet completed, a standard thermal survey may not always be practical because heating may not be commissioned and access can be limited. A pre-completion inspection or snagging survey can still identify visible workmanship concerns, with thermal imaging considered once the home is occupied and suitable conditions are available.
How a professional heat loss survey is carried out
A proper survey begins before the thermal camera is switched on. The surveyor will establish the property’s age, construction, known concerns, occupancy patterns and heating system. They will also consider external conditions, including outdoor temperature, cloud cover, wind and recent rainfall.
Inside, the inspection usually considers external-facing walls, ceilings below roof spaces, windows, external doors, loft hatches, service penetrations and junctions where different building elements meet. The surveyor may compare similar rooms and elevations. For example, a colder patch around one bedroom window is more meaningful when the equivalent window in another room performs normally under similar conditions.
Externally, thermal imaging can help identify patterns around façades, roof lines and openings, although access, weather and the property layout affect what can be assessed. Where safe and appropriate, specialist equipment such as drone imaging may add useful visual evidence for roof-related concerns. It does not replace close inspection where access is required, but it can help document areas that are otherwise difficult to view.
The final report should set out the inspection conditions, images, observations, likely causes and recommended next steps. At New Homes Inspections, findings are presented in a clear, practical format so homeowners can distinguish between an issue needing developer attention, a matter requiring further investigation and a condition that may be influenced by normal use of the home.
What the thermal images may reveal
Thermal imaging is especially effective at highlighting patterns that are difficult to see with the naked eye. A linear cold band at the ceiling edge may suggest an issue at the wall-to-roof junction. A concentrated cold area around a loft hatch can indicate insufficient insulation or poor sealing. Cooler areas around an external door may point to draught paths, adjustment issues or incomplete seals.
A large irregular cold patch on an external wall can raise concern about insulation continuity, while a colder area below a window may be associated with construction junctions or air movement. Warm patterns on an external elevation can also be relevant, as they may indicate a route of heat loss from inside the home.
However, a thermal image is not a diagnosis in isolation. Moisture can make a surface appear cooler because evaporation reduces its temperature. A cold internal wall may be caused by furniture restricting air circulation rather than a hidden construction defect. Where the evidence suggests a more complex issue, further investigation may be needed, such as moisture testing, targeted opening-up works or an airtightness assessment.
Preparing your home for the survey
Good preparation improves the value of the inspection. Keep the heating operating normally for a period before the appointment, unless the surveyor gives different instructions. The aim is generally to establish stable internal conditions, not to overheat the property for one day.
Avoid leaving windows and external doors open shortly before the visit. If possible, move large items of furniture slightly away from external walls where concerns are present, as this allows the surveyor to view the surface and reduces misleading cold spots caused by restricted airflow. Make sure loft hatches, meter cupboards and rooms with known issues can be accessed.
Tell the surveyor about recent leaks, alterations, repairs, extractor fan problems, condensation and rooms that are difficult to heat. This context helps focus the inspection and ensures that the report addresses the concerns most relevant to your home.
Using the report with your developer
A well-written report gives you more than thermal photographs. It records the location of each finding, the conditions at the time of inspection, supporting visual evidence and a reasoned explanation of the likely concern. That makes discussions with a developer, managing agent or contractor more focused.
When raising an issue, keep the communication factual. Refer to the report finding, explain the effect on the home – such as a persistent cold room, draught or condensation risk – and request an inspection and proposed remedial action. Avoid assuming the exact cause where further investigation is recommended. The developer may need to inspect behind finishes or test the relevant element before agreeing a repair.
Keep copies of correspondence, appointments, repair records and photographs. If remedial work is completed, a follow-up inspection can be worthwhile where the original issue was significant or where confidence in the repair is limited. This creates a clear record that the concern has been checked rather than merely reported.
Heat loss, condensation and mould
Heat loss does not automatically mean mould, but cold surfaces increase the risk of condensation when humid indoor air meets them. Bedrooms, bathrooms, kitchens and corners behind furniture are common locations because they combine moisture production with reduced air movement.
The right solution depends on the cause. Improving ventilation alone may not resolve a cold bridge. Equally, adding insulation will not correct a continuously leaking shower tray or an extractor fan that does not operate properly. A survey should separate these possibilities as far as the available evidence allows, so remedial work addresses the actual problem rather than treating symptoms.
A home should feel comfortable, dry and consistent from room to room. If yours does not, early independent evidence can turn an uncertain concern into a clear conversation about what needs to be put right.